
Starting QuikFynd as an EC2 instance is very simple because QuikFynd is available as an AMI (Amazon Machine Image) from Amazon Marketplace. We assume that you already know how to subscribe to software from Amazon marketplace. Once you have selected the right QuikFynd AMI to use, here are the steps to launch it as an EC2 instance. For your information, most of these steps should be fairly obvious if you have launched any AMI before.
1. Select your instance type
Once you decide to launch your QuikFynd Enteprise Search AMI, you will be asked to select an instance type. You can select any type of instance you desire. We recommend a a t2.medium instance at a minimum because it provides reasonable performance for smaller search indexes. If you anticipate searching through a very large number of files then a larger instance with more compute capacity may be more appropriate.

2. Configure your instance and select storage
You can select your instance's configuration such as network details, shutdown behavior etc but default settings will work.

Next you can chose to select amount of EBS storage you want to assign. By default QuikFynd will use 32GB of EBS volume. You may change it if you think your index size may be very big. Allocate about 3-4% of amount of storage you will be searching.

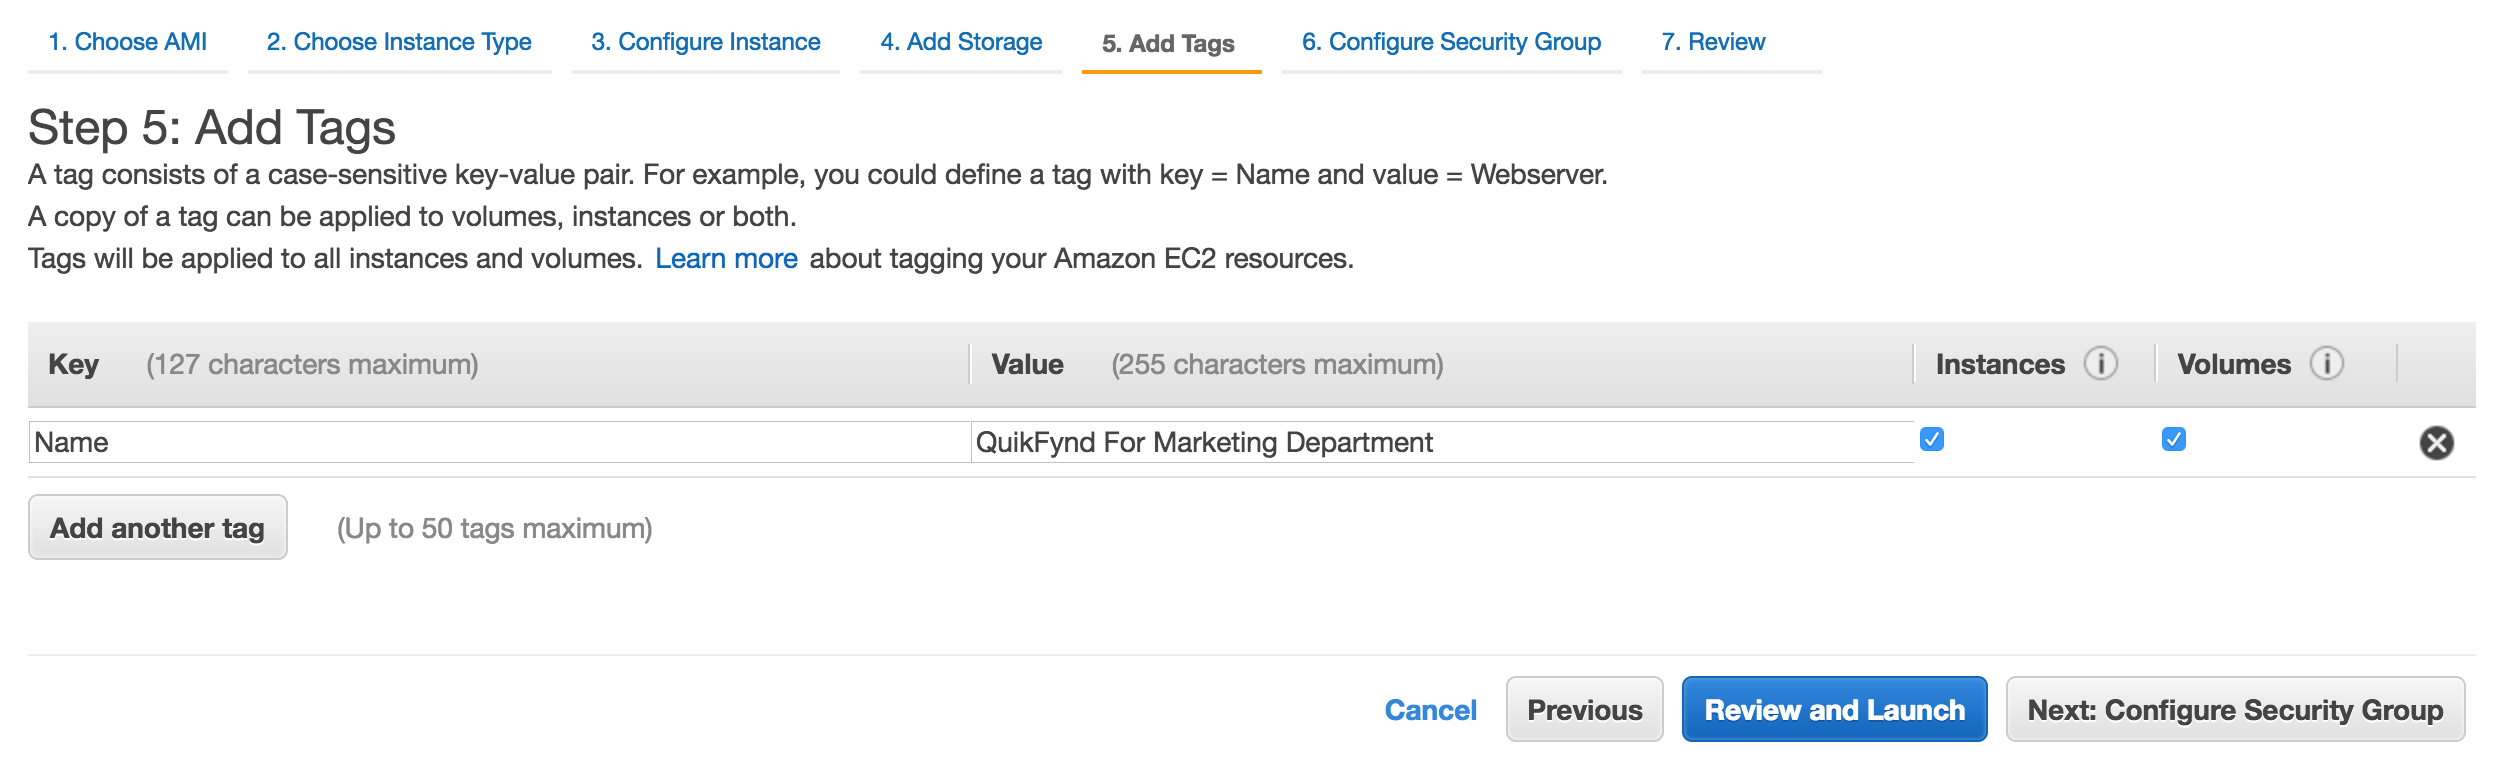
3. Provide a name for your instance
You can add various tags to your instance. We recommend specifying at least a Name tag so that you can quickly refer to it in the list of various EC2 instances. In this example, we will add a Name key with the value "QuikFynd for Marketing Department"
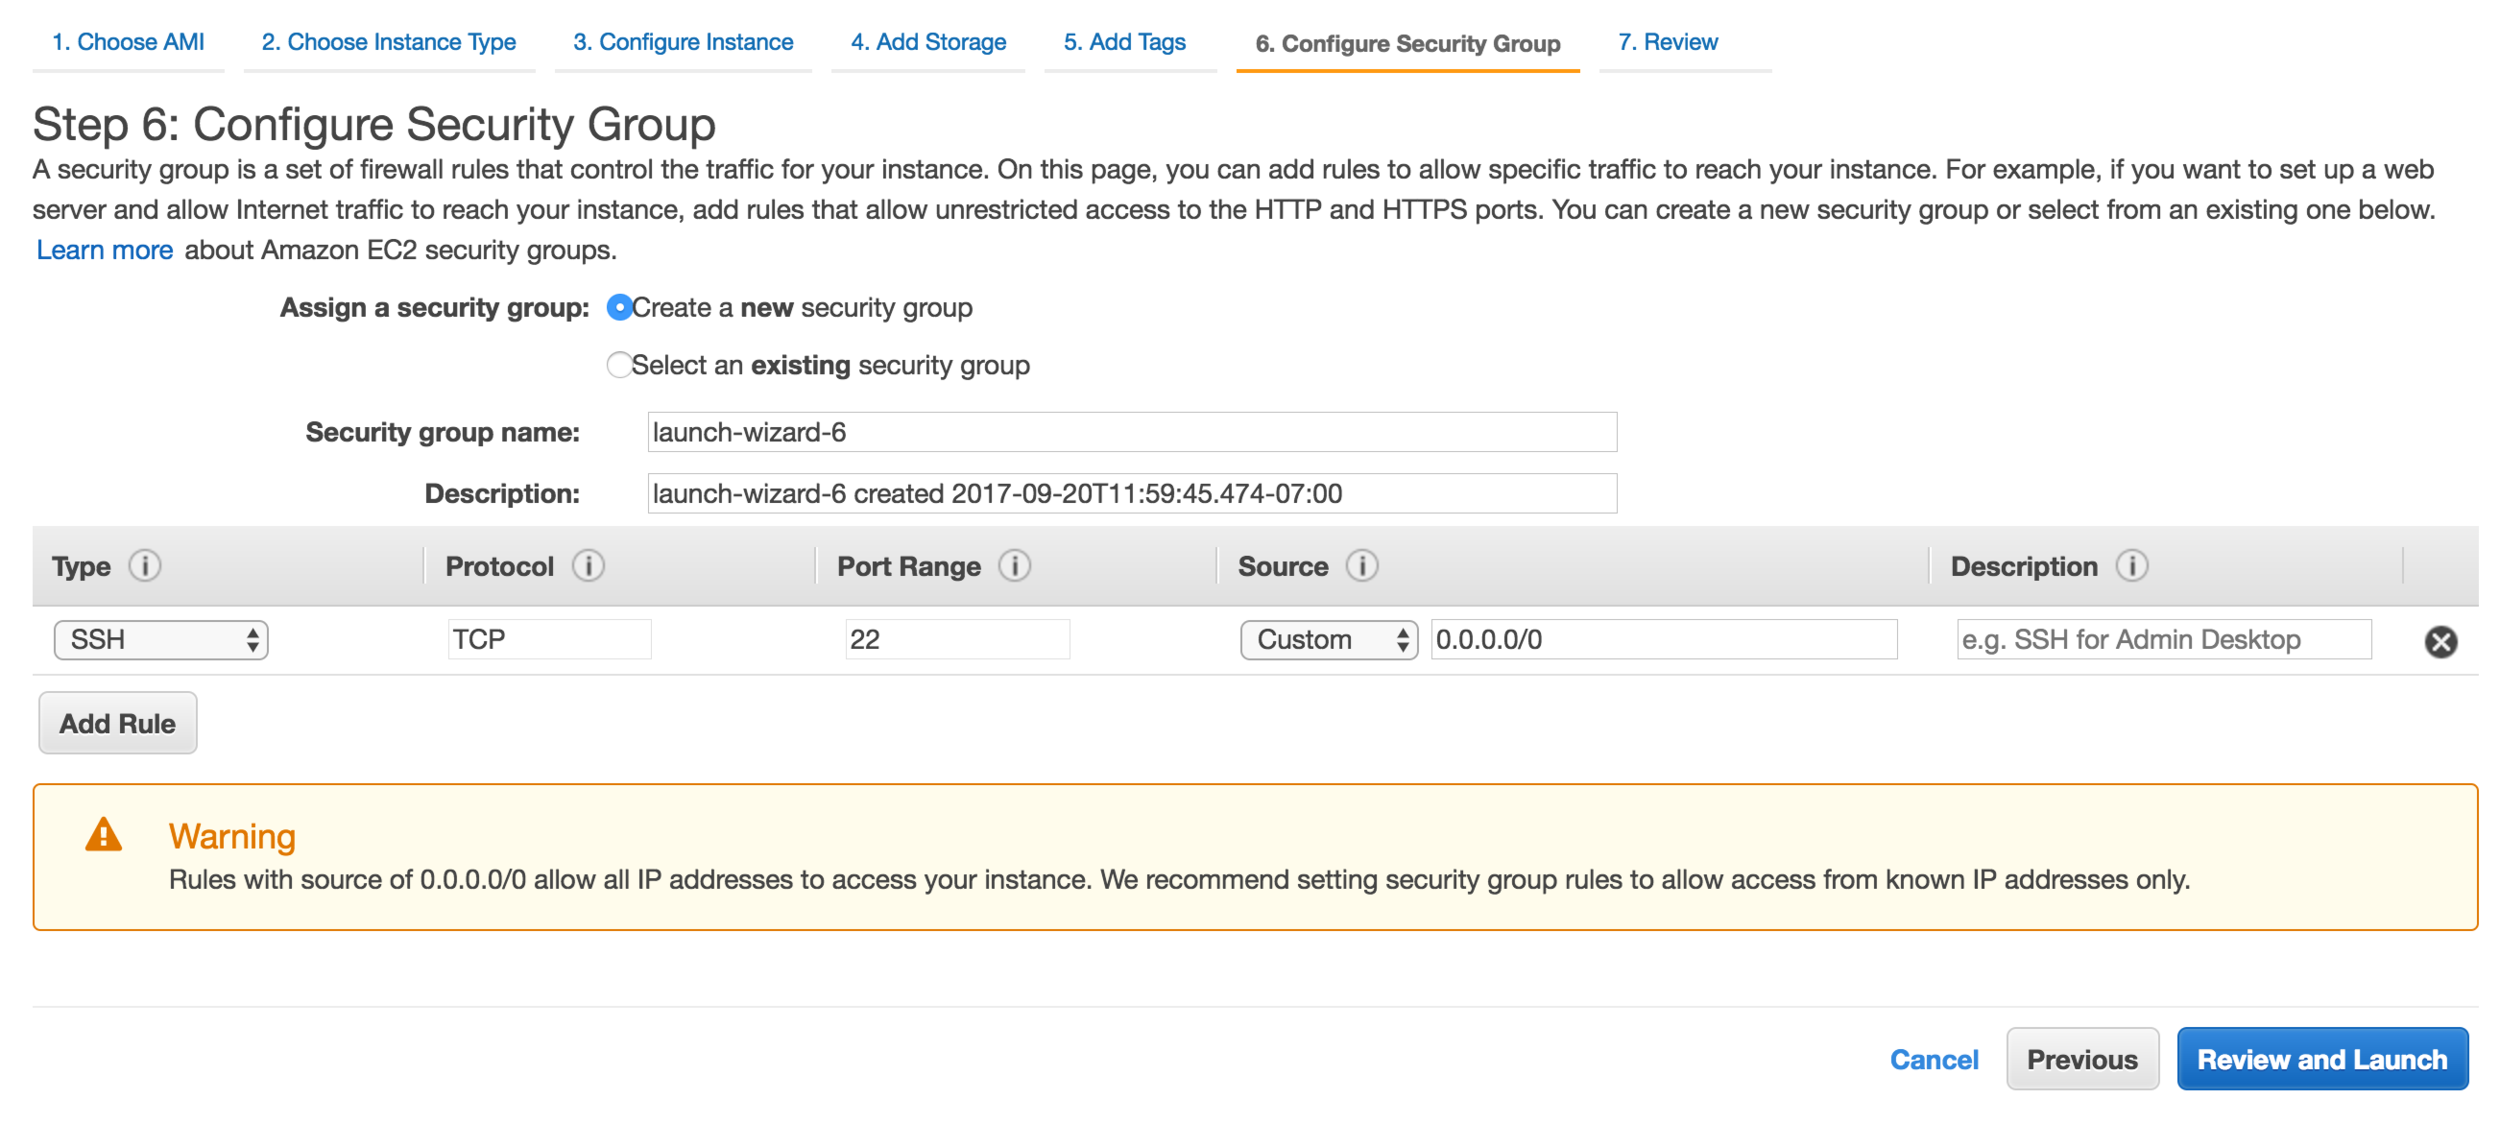
4. Select security group and open ports
You may select the default option of creating a new security group or chose an existing group if your security policies require that. We recommend not opening any unnecessary ports to your instance.
Note: QuikFynd does require two ports to be open - one is port 443 for https traffic and second is 444 for REST based API. Add a new security rule to make sure both 443 and 444 are open.
You may open these ports to everyone or restrict them to only certain IP addresses, for example if you only want to access QuikFynd from within your company.

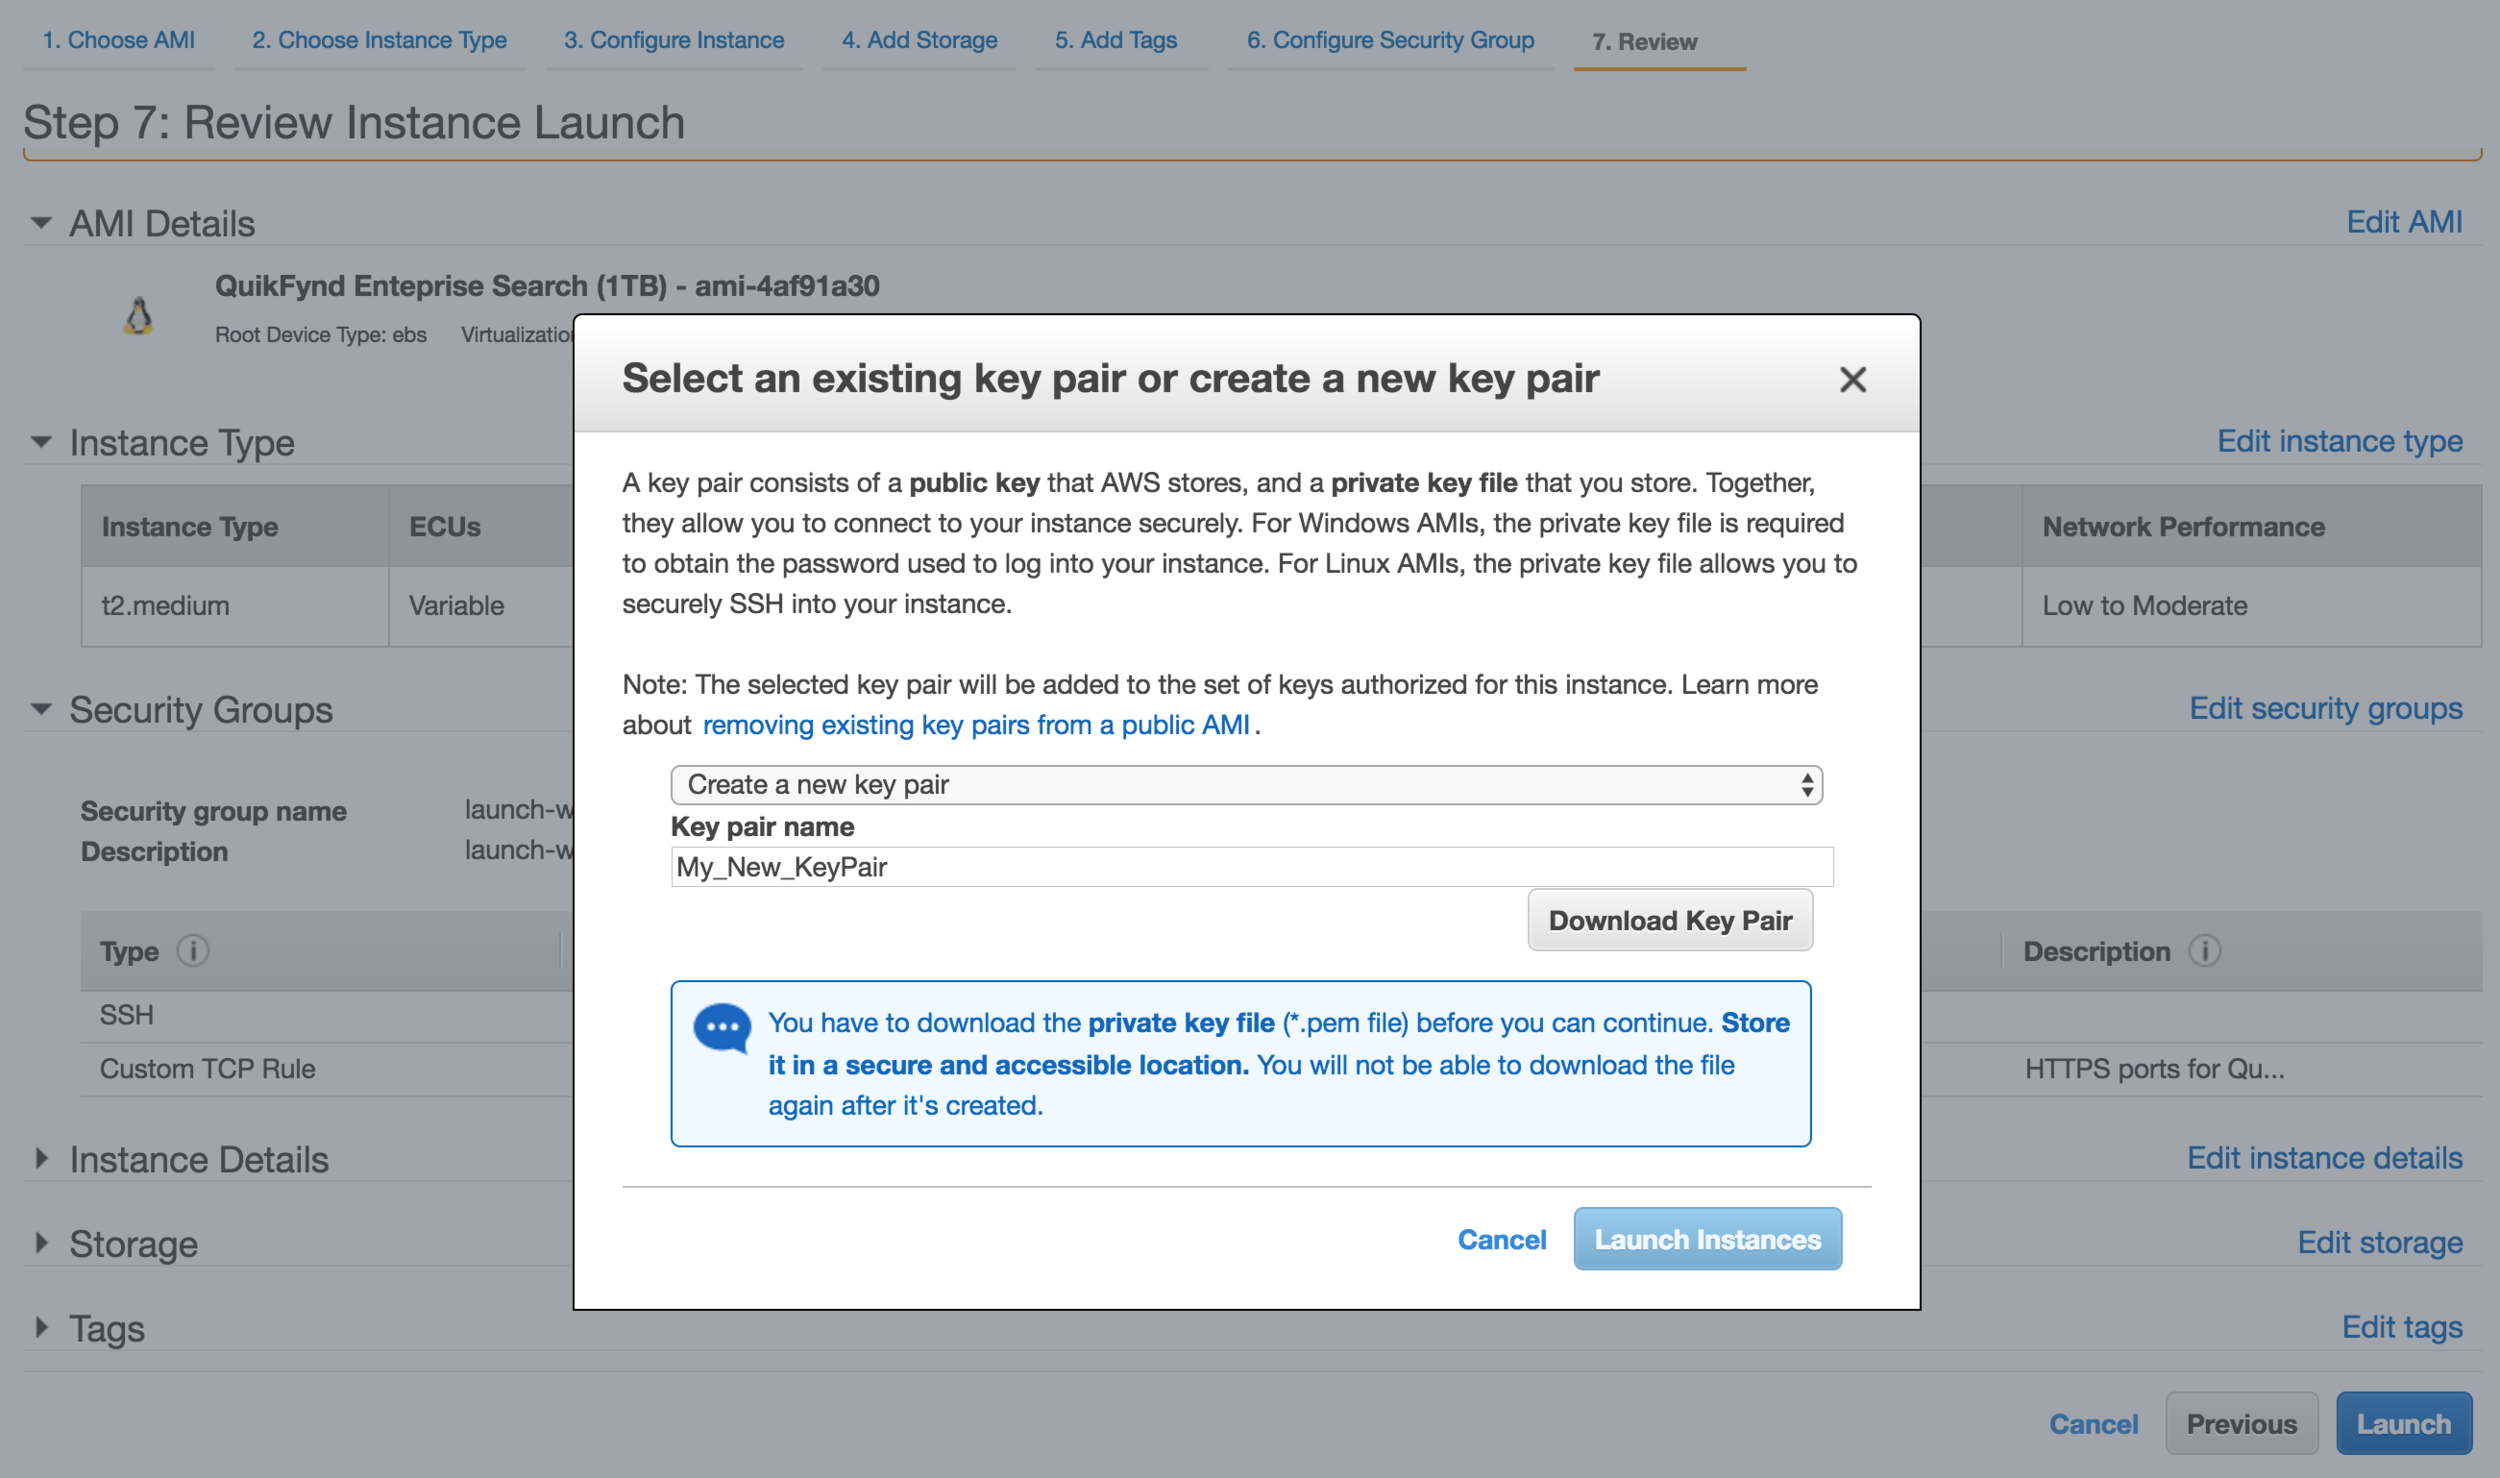
5. Review and launch
You will be able to review all the details before you launch your instance. Do a quick review to make sure everything looks as what you intended and click "Launch Instance".

You will be asked to either create a new key pair or choose an existing key pair for administrative access to your instance. In this example, we create a new key pair and save it securely to our computer by downloading it. While not necessary, but if we need SSH access to our instance, we have to use this key pair.
After a few seconds, you will see a screen that your instances are launching and you can click on "View Instance" to see your QuikFynd instance in your list of running EC2 instances.

6. Note down instance details (Important)
Now that QuikFynd is launched, you will see it in the list of your EC2 instances. We had provided a name "QuikFynd For Marketing Department" as a name for the instance. You can filter it by this name and you will find your instance. QuikFynd has a built in web user interface and you may access it at the public IP address of your instance. For this, you will need to note down your instance IP address. Instance ID for your instance is also the default password. You will need this in next step, so note down both the IP address and instance id.

7. Access QuikFynd from Web Browser
QuikFynd web based UI is available via secure http. You want to hit following URL:
https://ipv4_public_ip_of_your_instance
In our case, the IP address is 52.91.85.244, so URL is https://52.91.85.244
NOTE: QuikFynd Web UI is only supported on Google Chrome browser for now. We plan to add support for other browsers in near future.

Secure http requires a certificate signed by a 3rd party and assigned to your domain. QuikFynd uses a self signed certificate but this is not automatically accepted by browsers. You can change the security certificate on your QuikFynd instance but you can also click on "Advanced" and proceed to the web UI. Your communication is still secure.

8. Login to QuikFynd and start searching
You will now be able to see login screen of QuikFynd application. You may login as "quikfynd" with the password which is same as your instance ID that you noted in step 6. Go ahead and login and start using QuikFynd.
